
Getting started with API Integration - Authentication process
Introduction
If you’ve just purchased a website API integration from Ankor Software, here’s a clear guide to help you or your developer get started with the authentication and protocol process. This explanation assumes you’re either a developer or assisting one, and it outlines the steps and content needed to understand and implement the API integration.
What Protocol does Ankor webite API Use?
Ankor Software Website APIs uses the OAuth 2.0 protocol for authentication and authorization. We supports common OAuth 2.0 for all API offering. This page gives an overview of the OAuth 2.0 authorization scenarios that Ankor supports, and provides a brief overview of the steps.
1. Obtaining your API client credentials
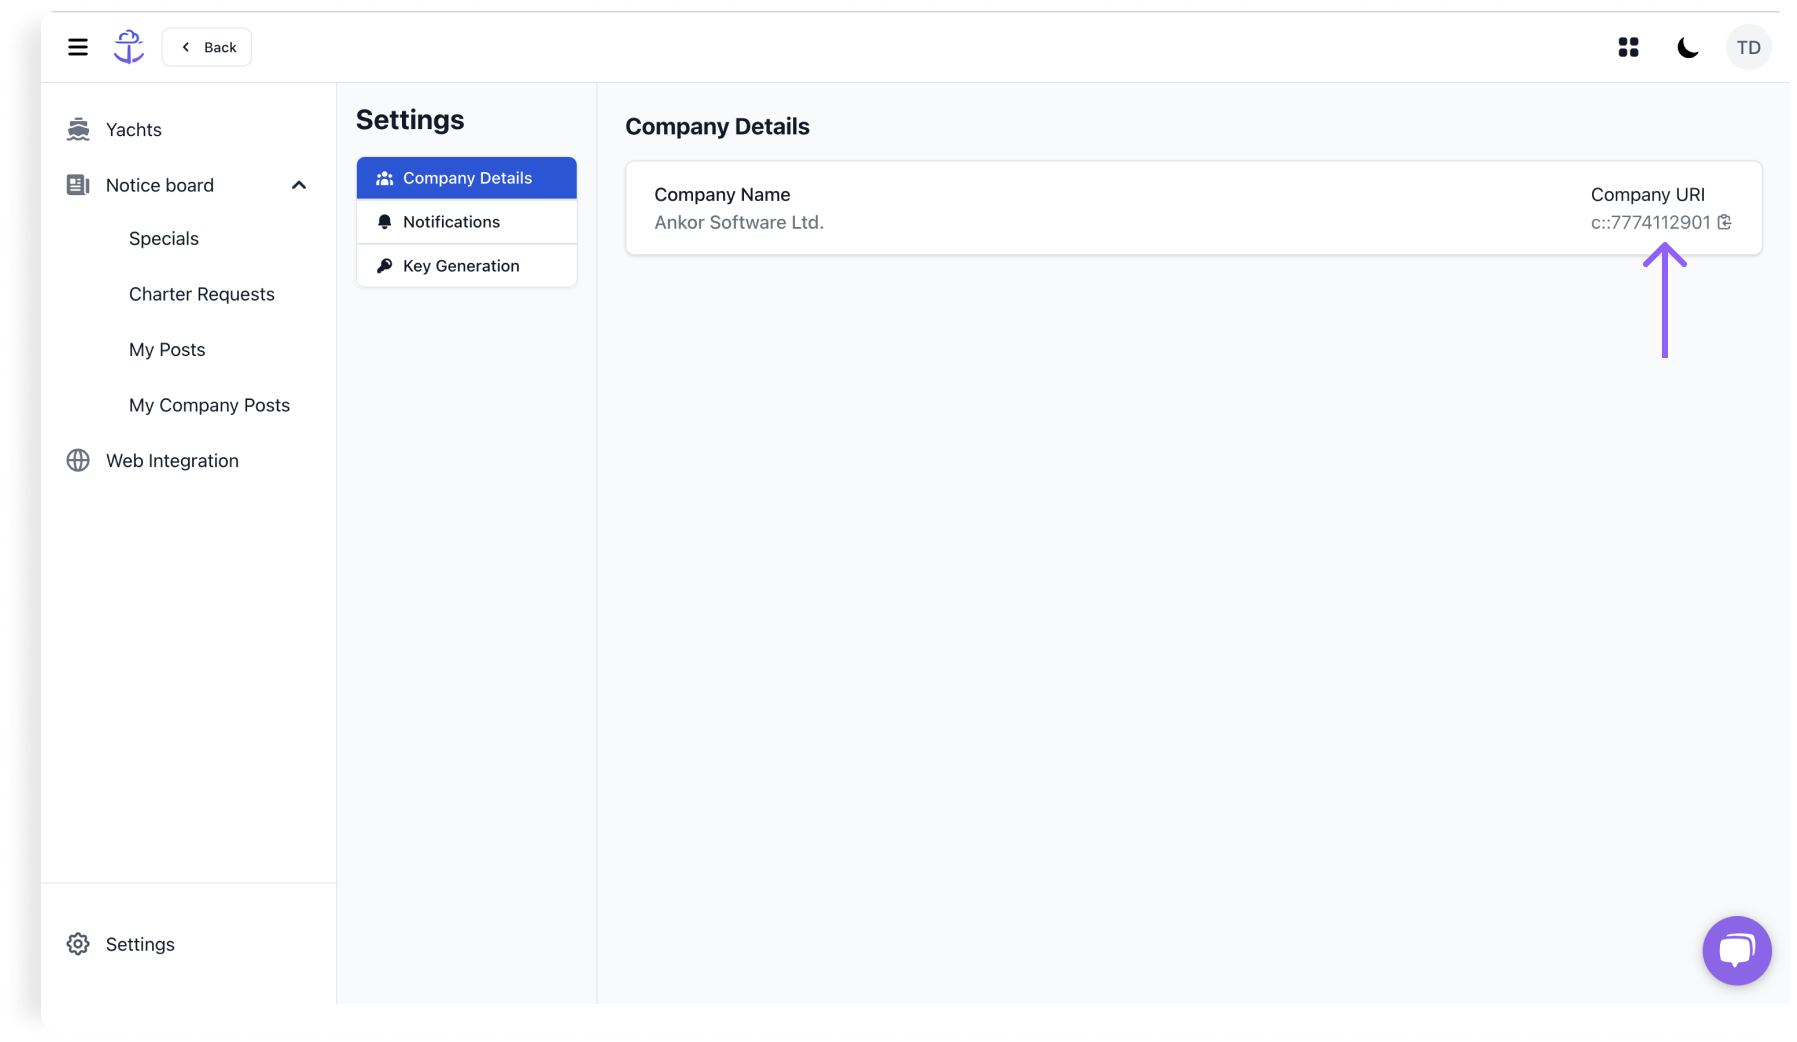
Before making any API calls, you’ll need your authentication credentials. These are provided by Ankor Software after purchase. Start by loging into Calendars and click on your 'Settings' page.
- To obtain your Company URL, click on 'Company Details' inside your settings page and copythe Company URL.
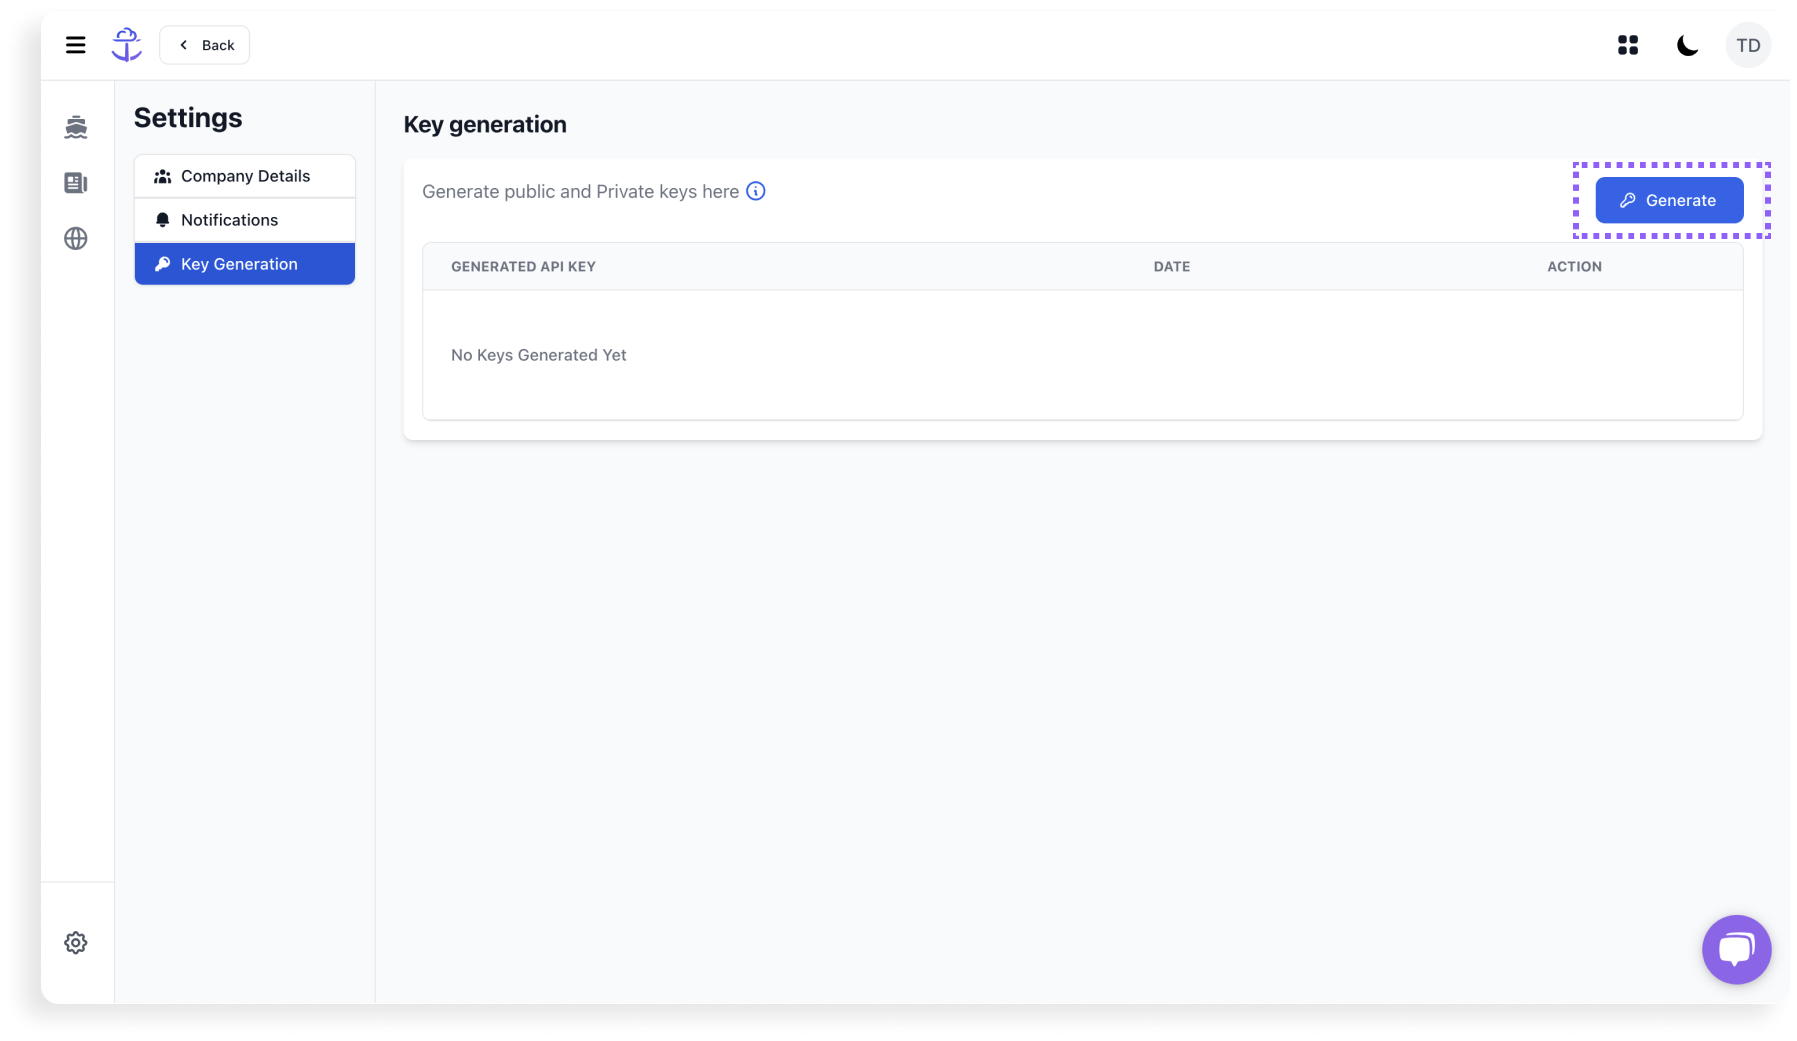
- Next, click on 'Key generation' page inside settings.
- Click on the button 'Generate'.
- A dialogue box will appear with shows your:
- Key ID (KID)
- Private Key
- Public Key
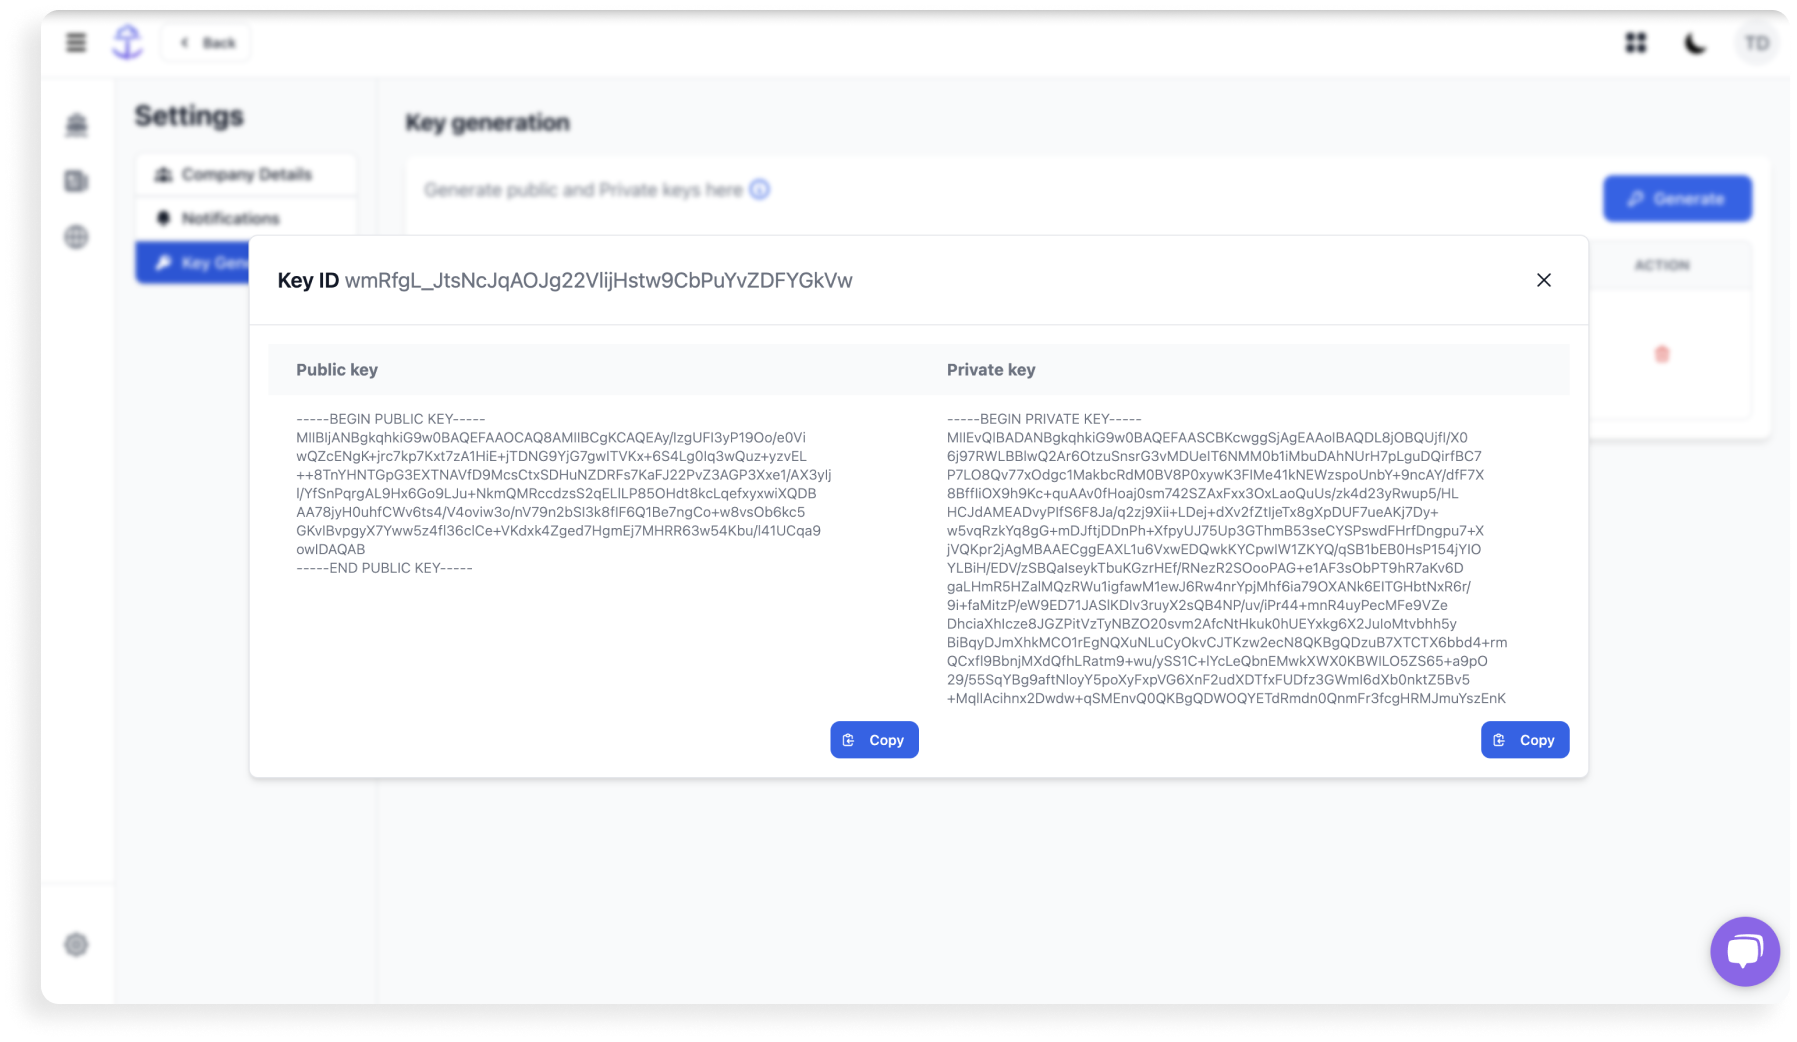
Store them away safely. This is what will be used to generate a JWT.
Pre-requisites for constructing the JWT:
We use JWT for authentication. There are pre-requisites to creating a JWT in-order to use the APIs.
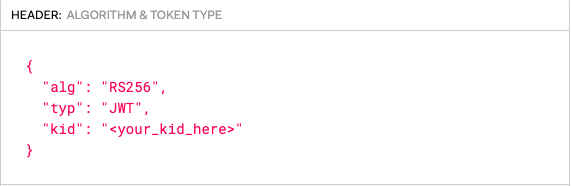
- Header
- Payload
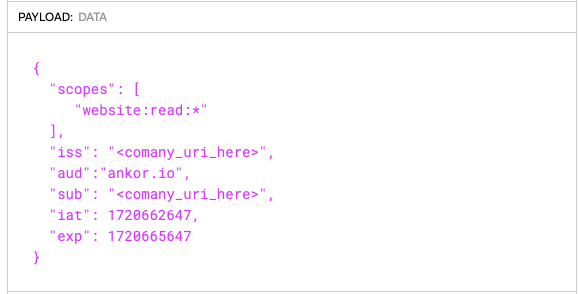
{
   "scopes": [
      "website:read:*"
],
"iss": "<company_uri_here>",
"aud" :"ankor.io",
"sub": "<company_uri_here>",
"iat": <current_epoch_time>,
"exp": <current_epoch_time+1hr>
}
- Scopes - Pass a valid claim set. For example,
- Retail Agent Website API use "website:read:*"
- Central Agent Entity API use "entity:*"
- Issuer - Your company URI.
- Audience - "ankor.io"
- Subject - Your company URI.
- Issued At - The time when this token is being issued.
- Expiry - The time after which the token expires. Must be less than 1 hour from issued at.
- Signature
Use you PRIVATE KEY to sign the jwt.
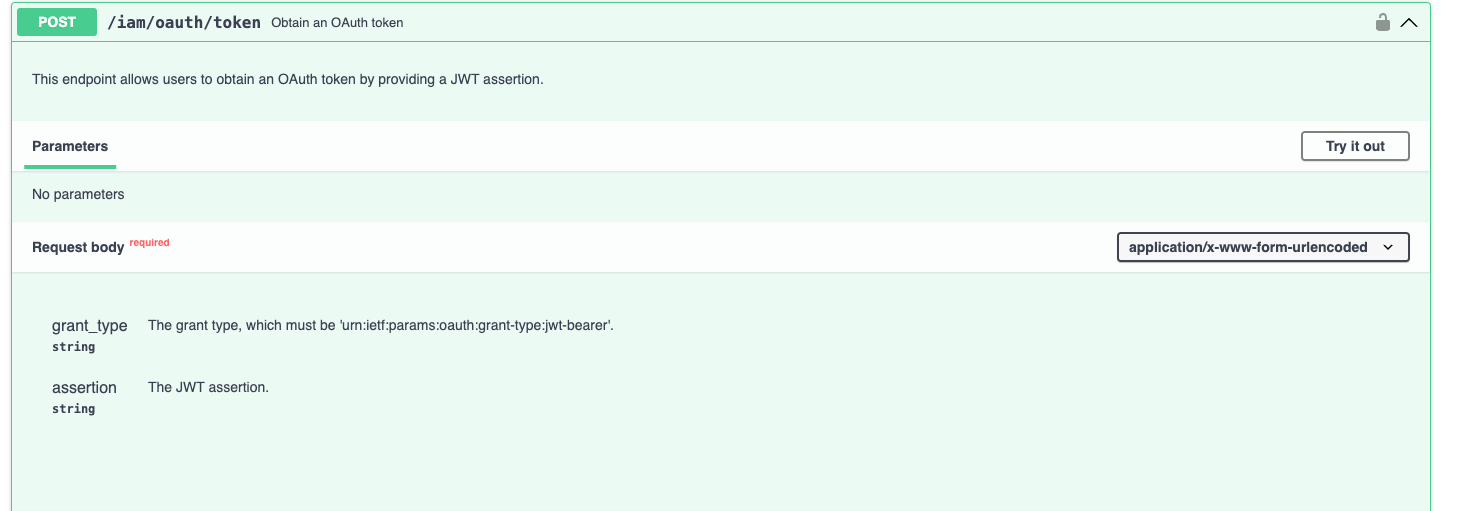
Obtain a token from Ankor Software's Identity & Access Management API
To request an access token from Ankor you can refer to the API docs in the IAM section. Use the generated JWT in the above step and pass it to the POST /iam/oauth/token request.
Sending the access token in an API call
On successful authentication, you will receive an access token that must be passed as a bearer to access Ankor's APIs.
Refreshing the token
Access tokens have limited lifetimes, 1 hour at most. If your application needs access beyond the lifetime of a single access token, simply obtain a new token.
References
Still Need Help?
Speak to our Customer Success team, who are here to support you via support@ankor.io or chat with us using the Life ring Help feature at the bottom right of our application.