Settings: Connect your external Calendar
Integrating your calendar with your yacht’s profile is a simple and efficient way to save you time and keep its availability accurate for bookings. You can update your calendar directly from your Google or Outlook account without needing to recreate events in our Fleet manager application.
How to connect your calendar
1. Start by logging into our Fleet Manager Calendars application and navigating to Settings > Integrations.
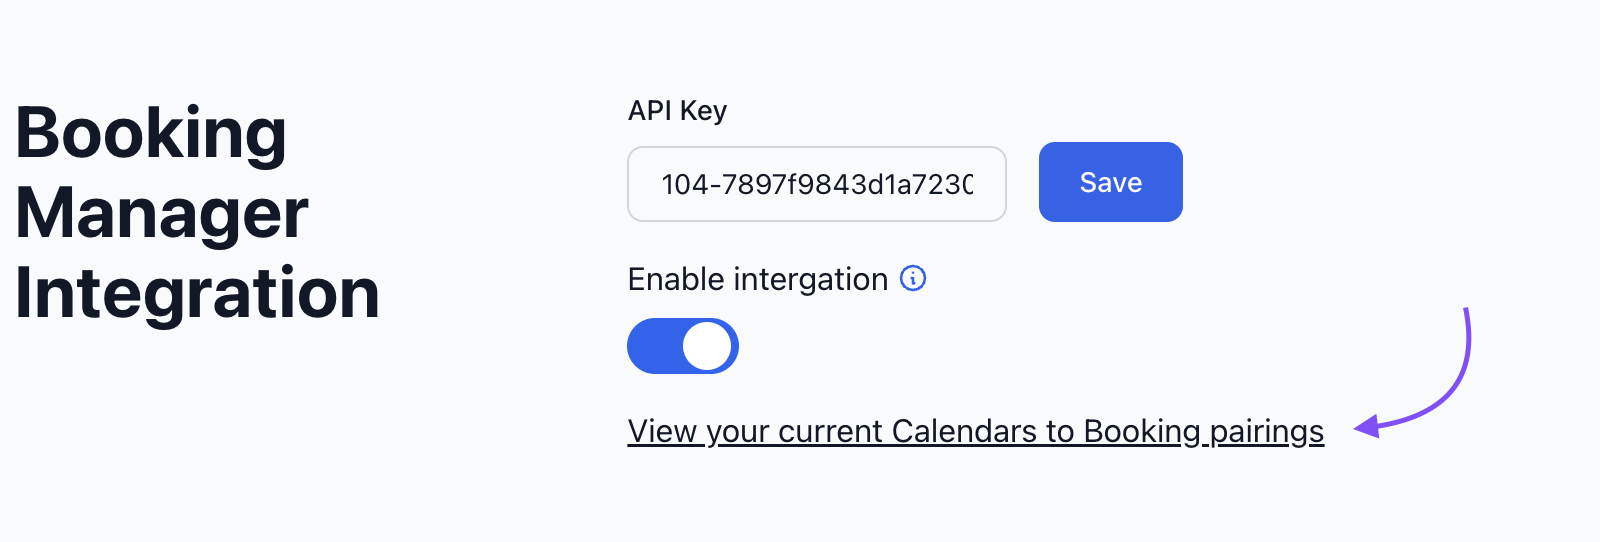
2. Find the Booking Manager Integration option and enable the Integration via the toggle.

3. Next, click ' View your current Calendars to Booking pairings'.
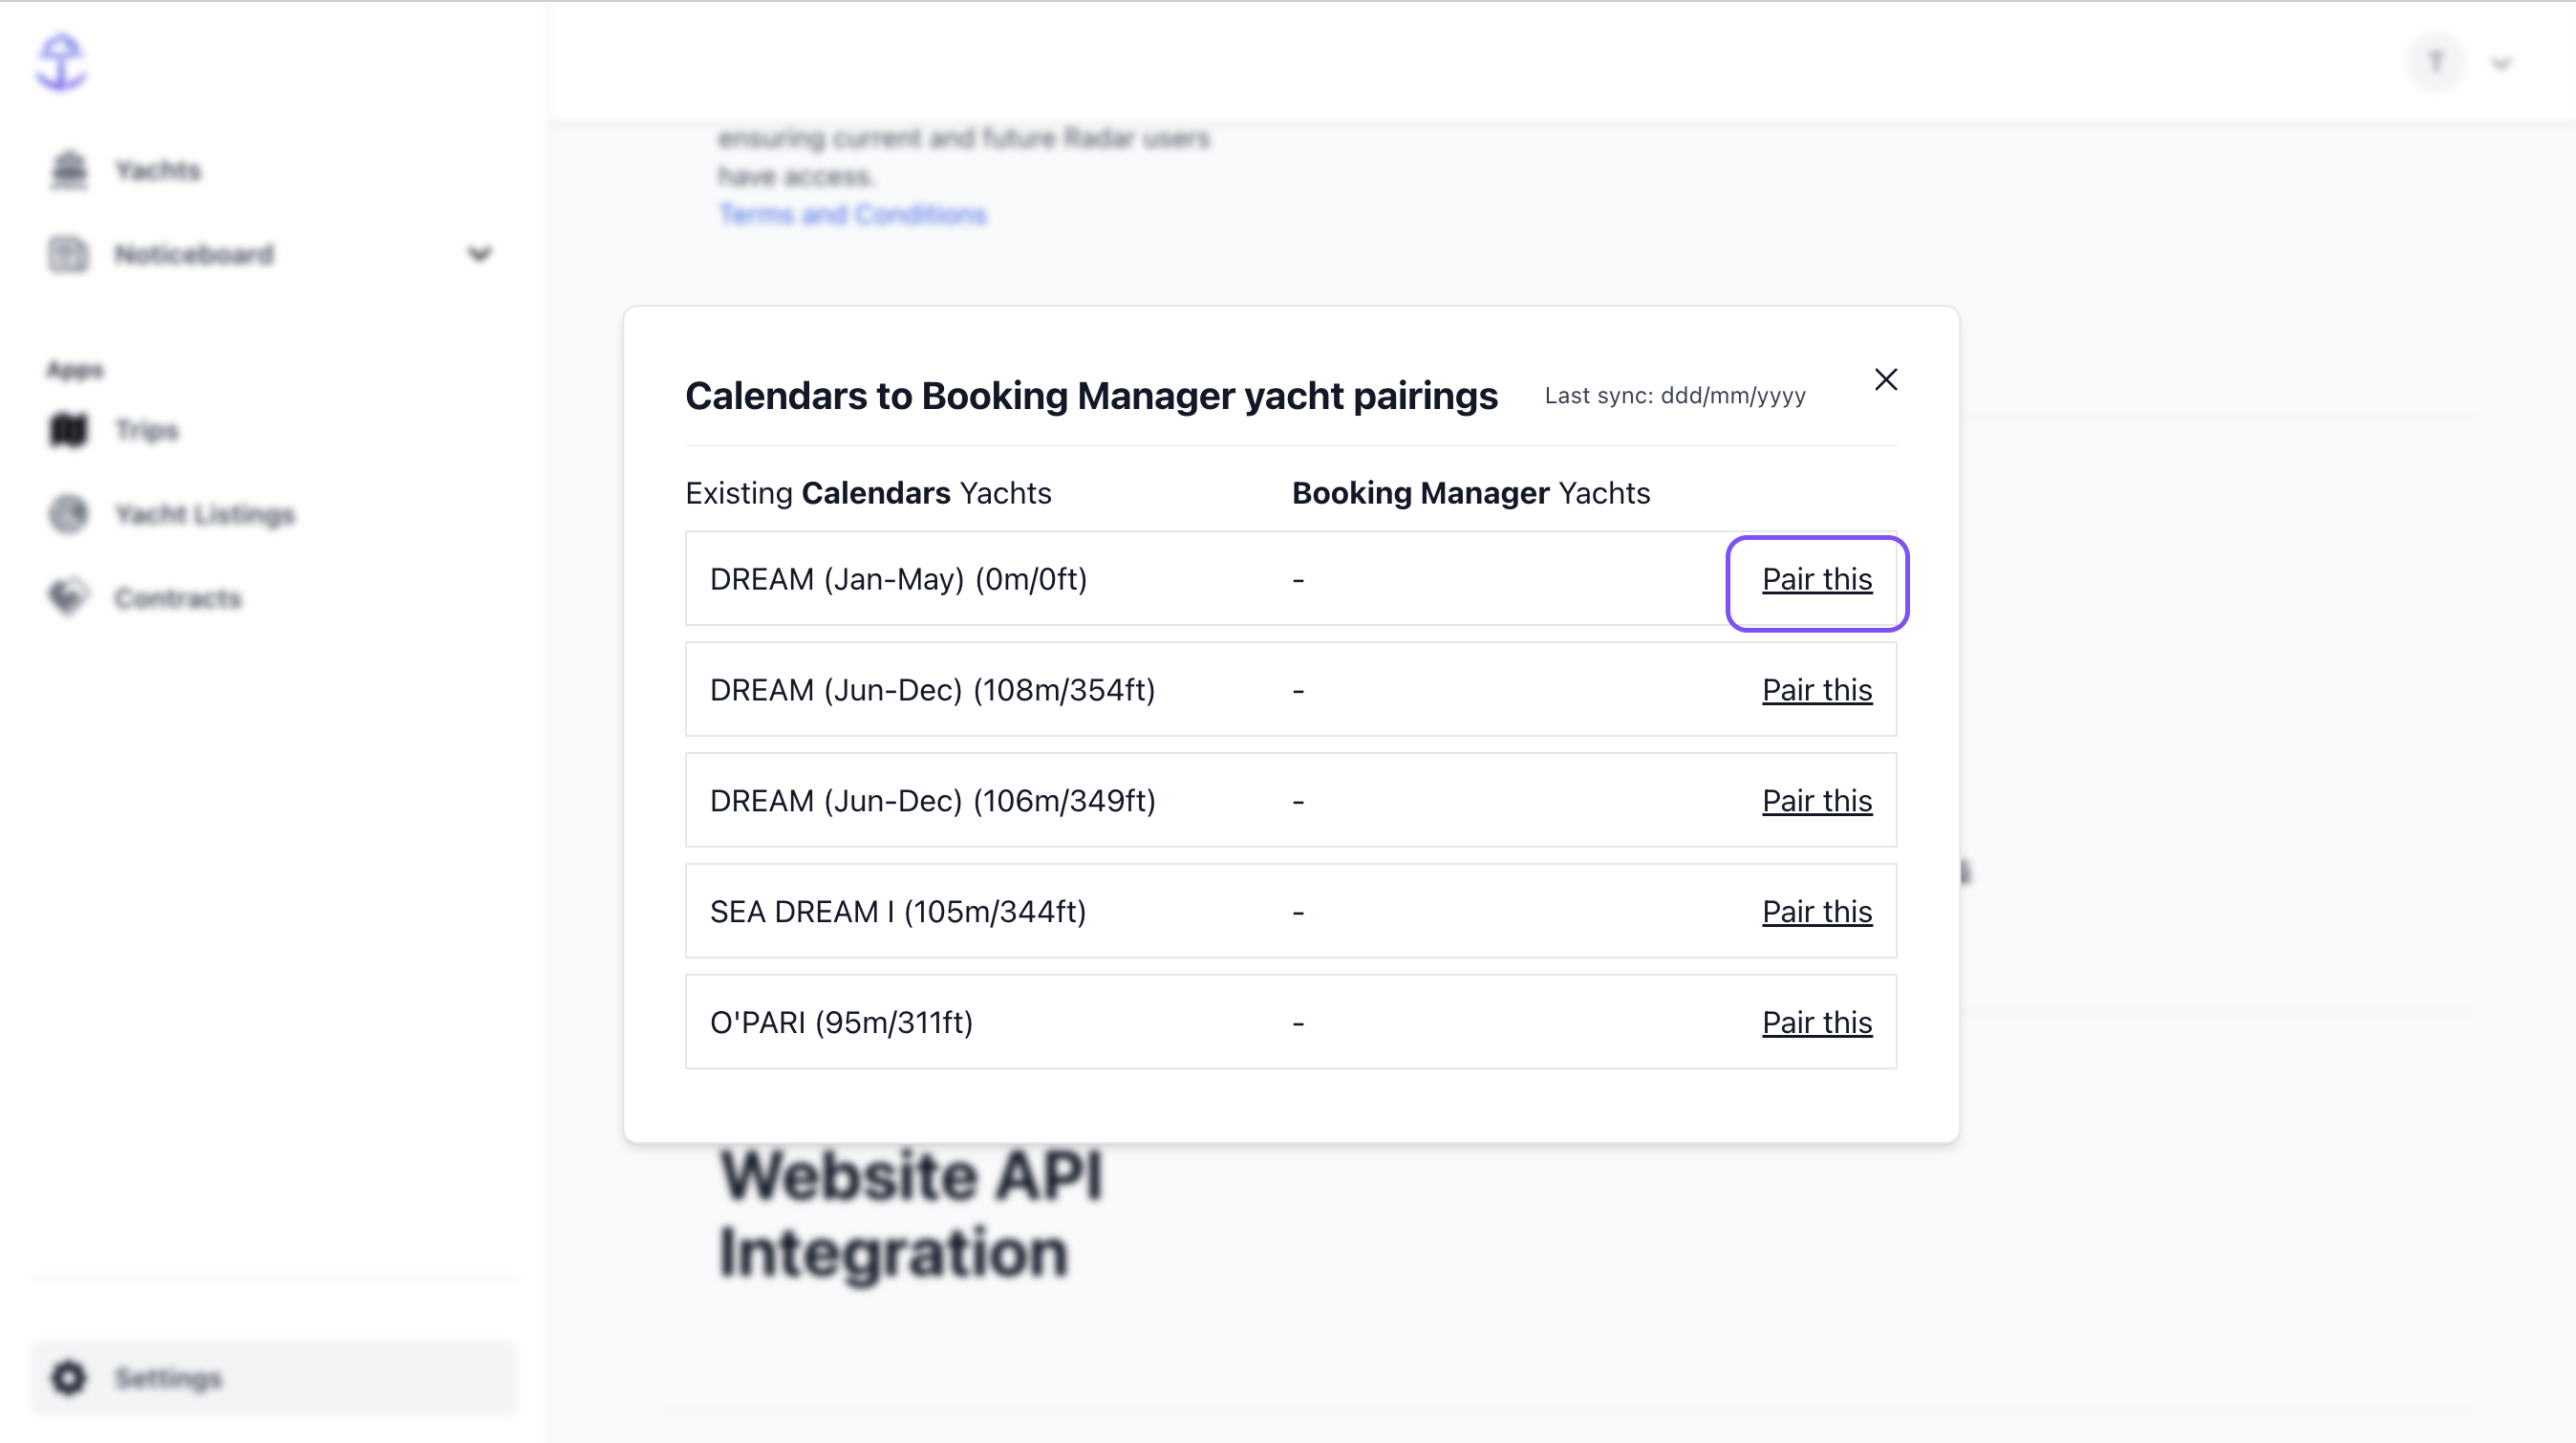
4. A popup will appear listing out all the yachts in your fleet. Find the yacht you wish to pair with your calendar and click 'Pair this'.
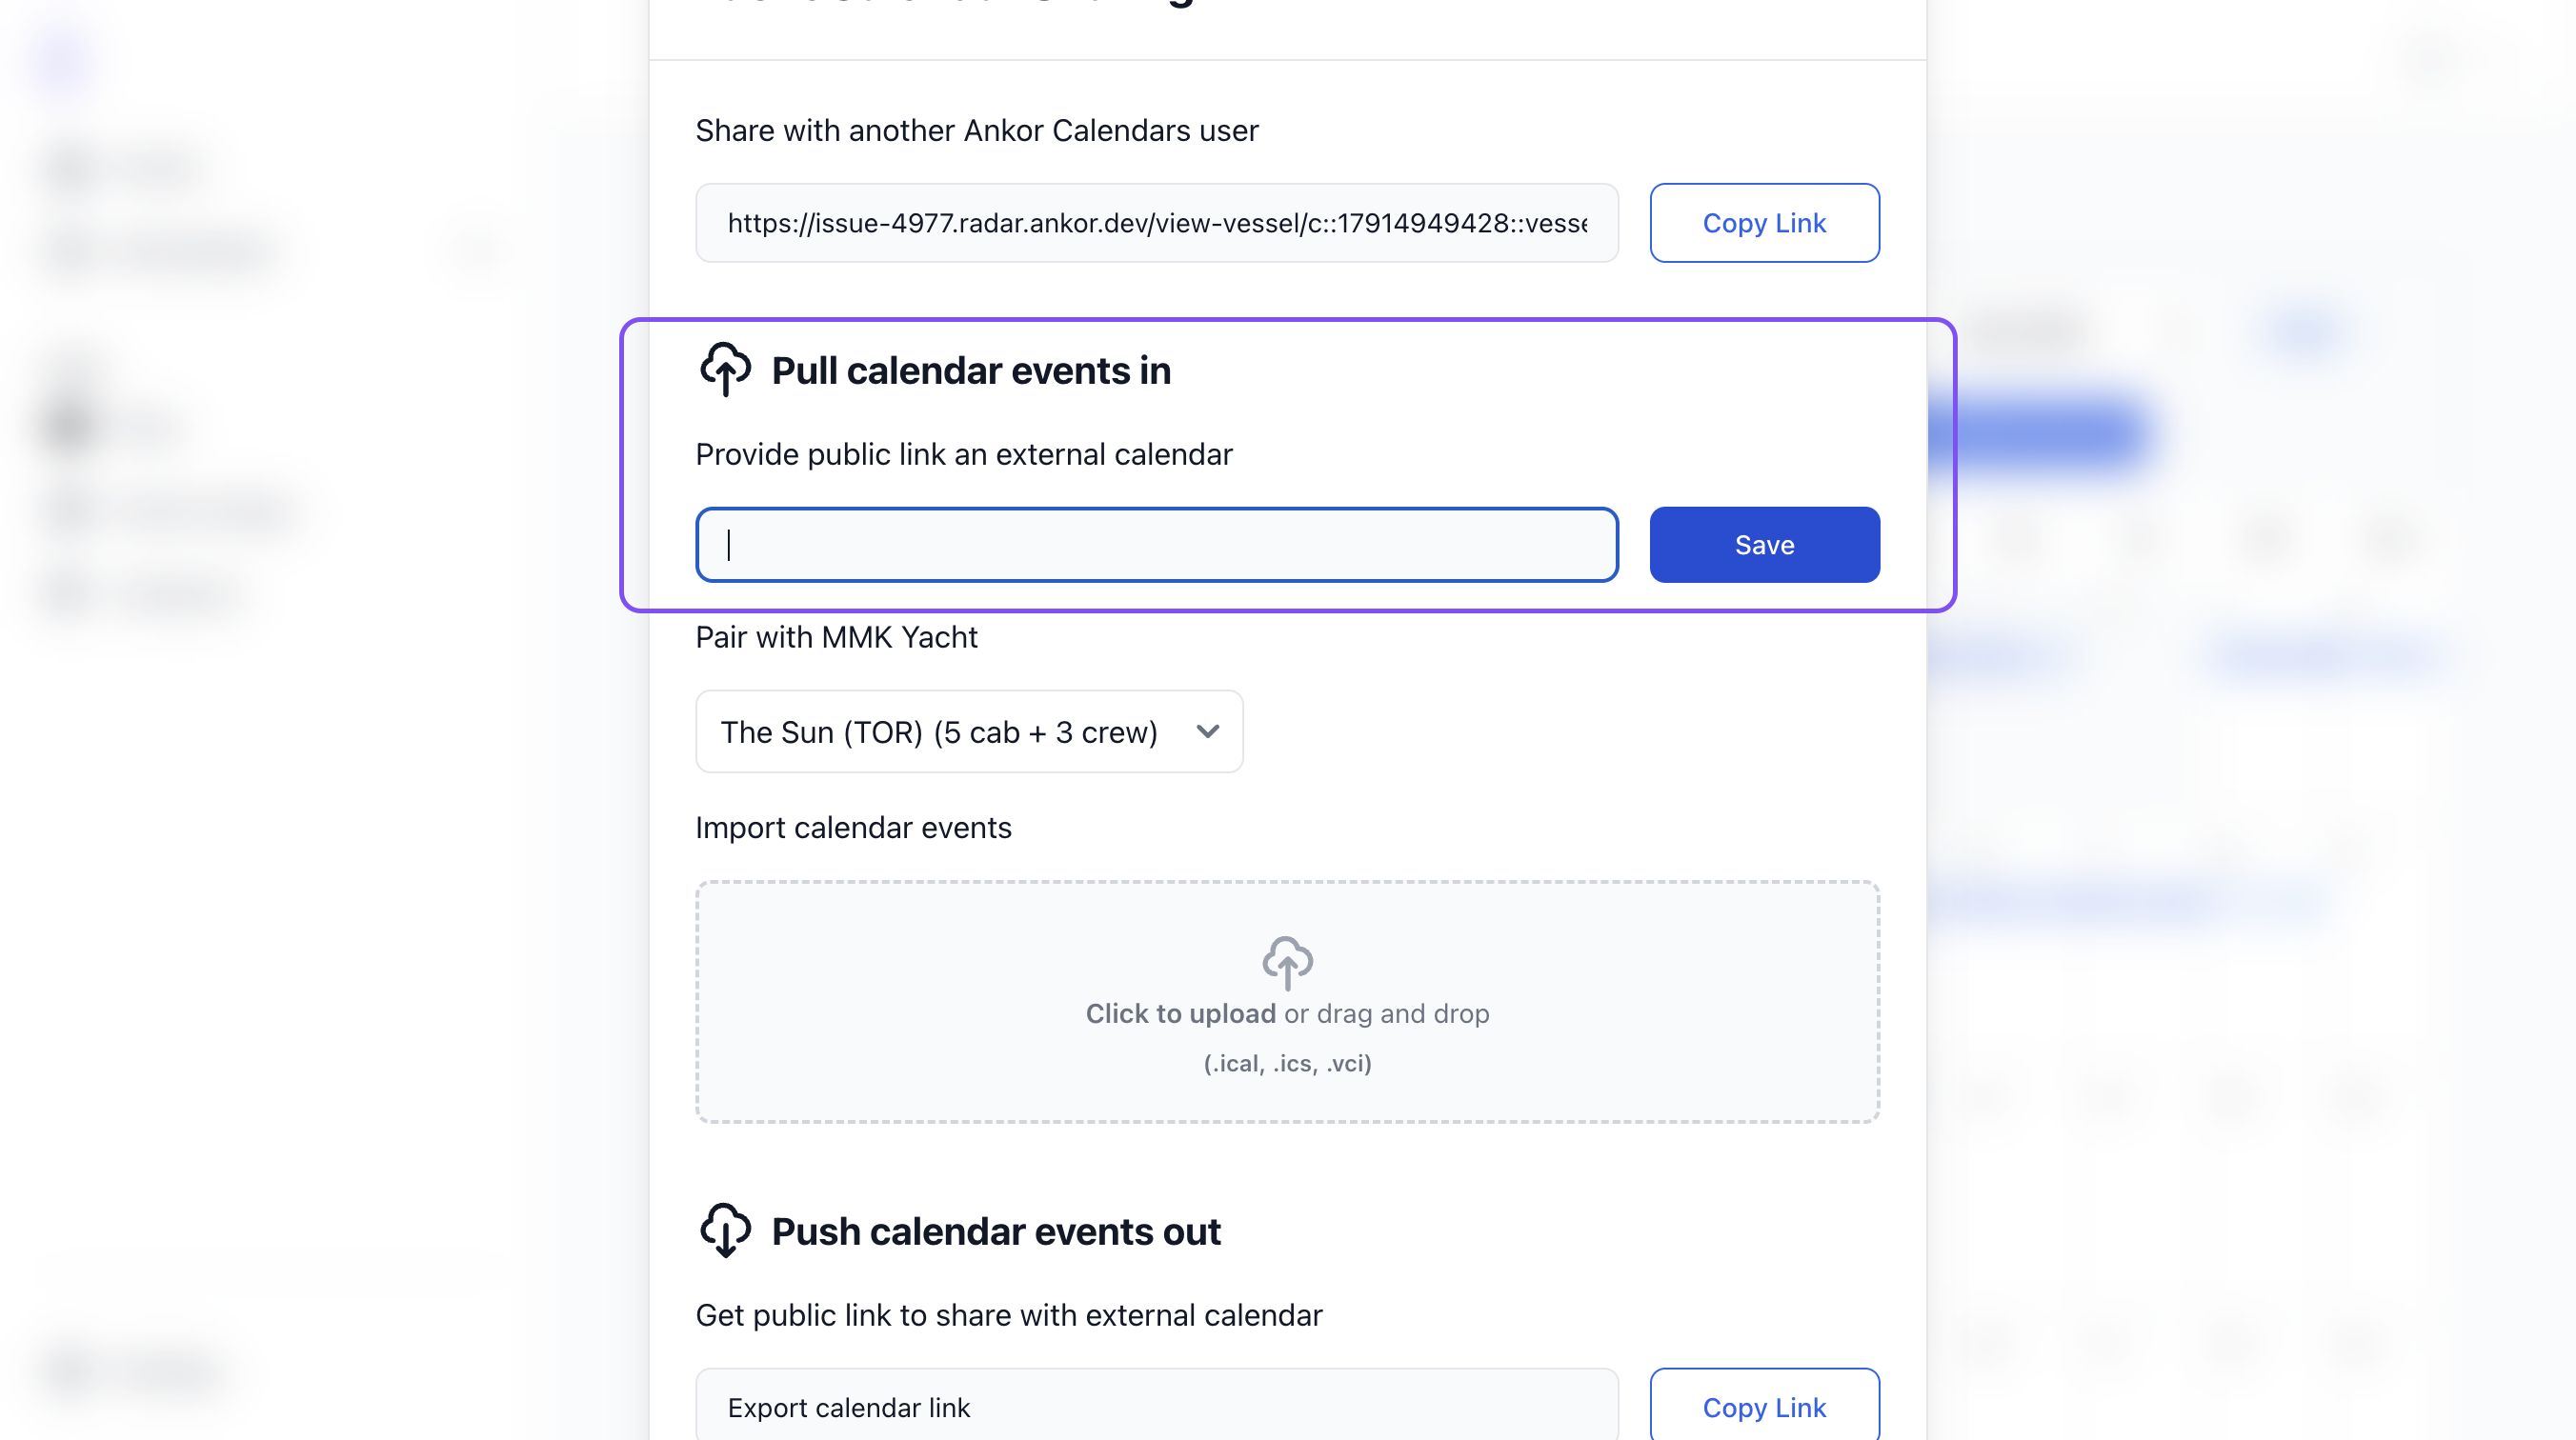
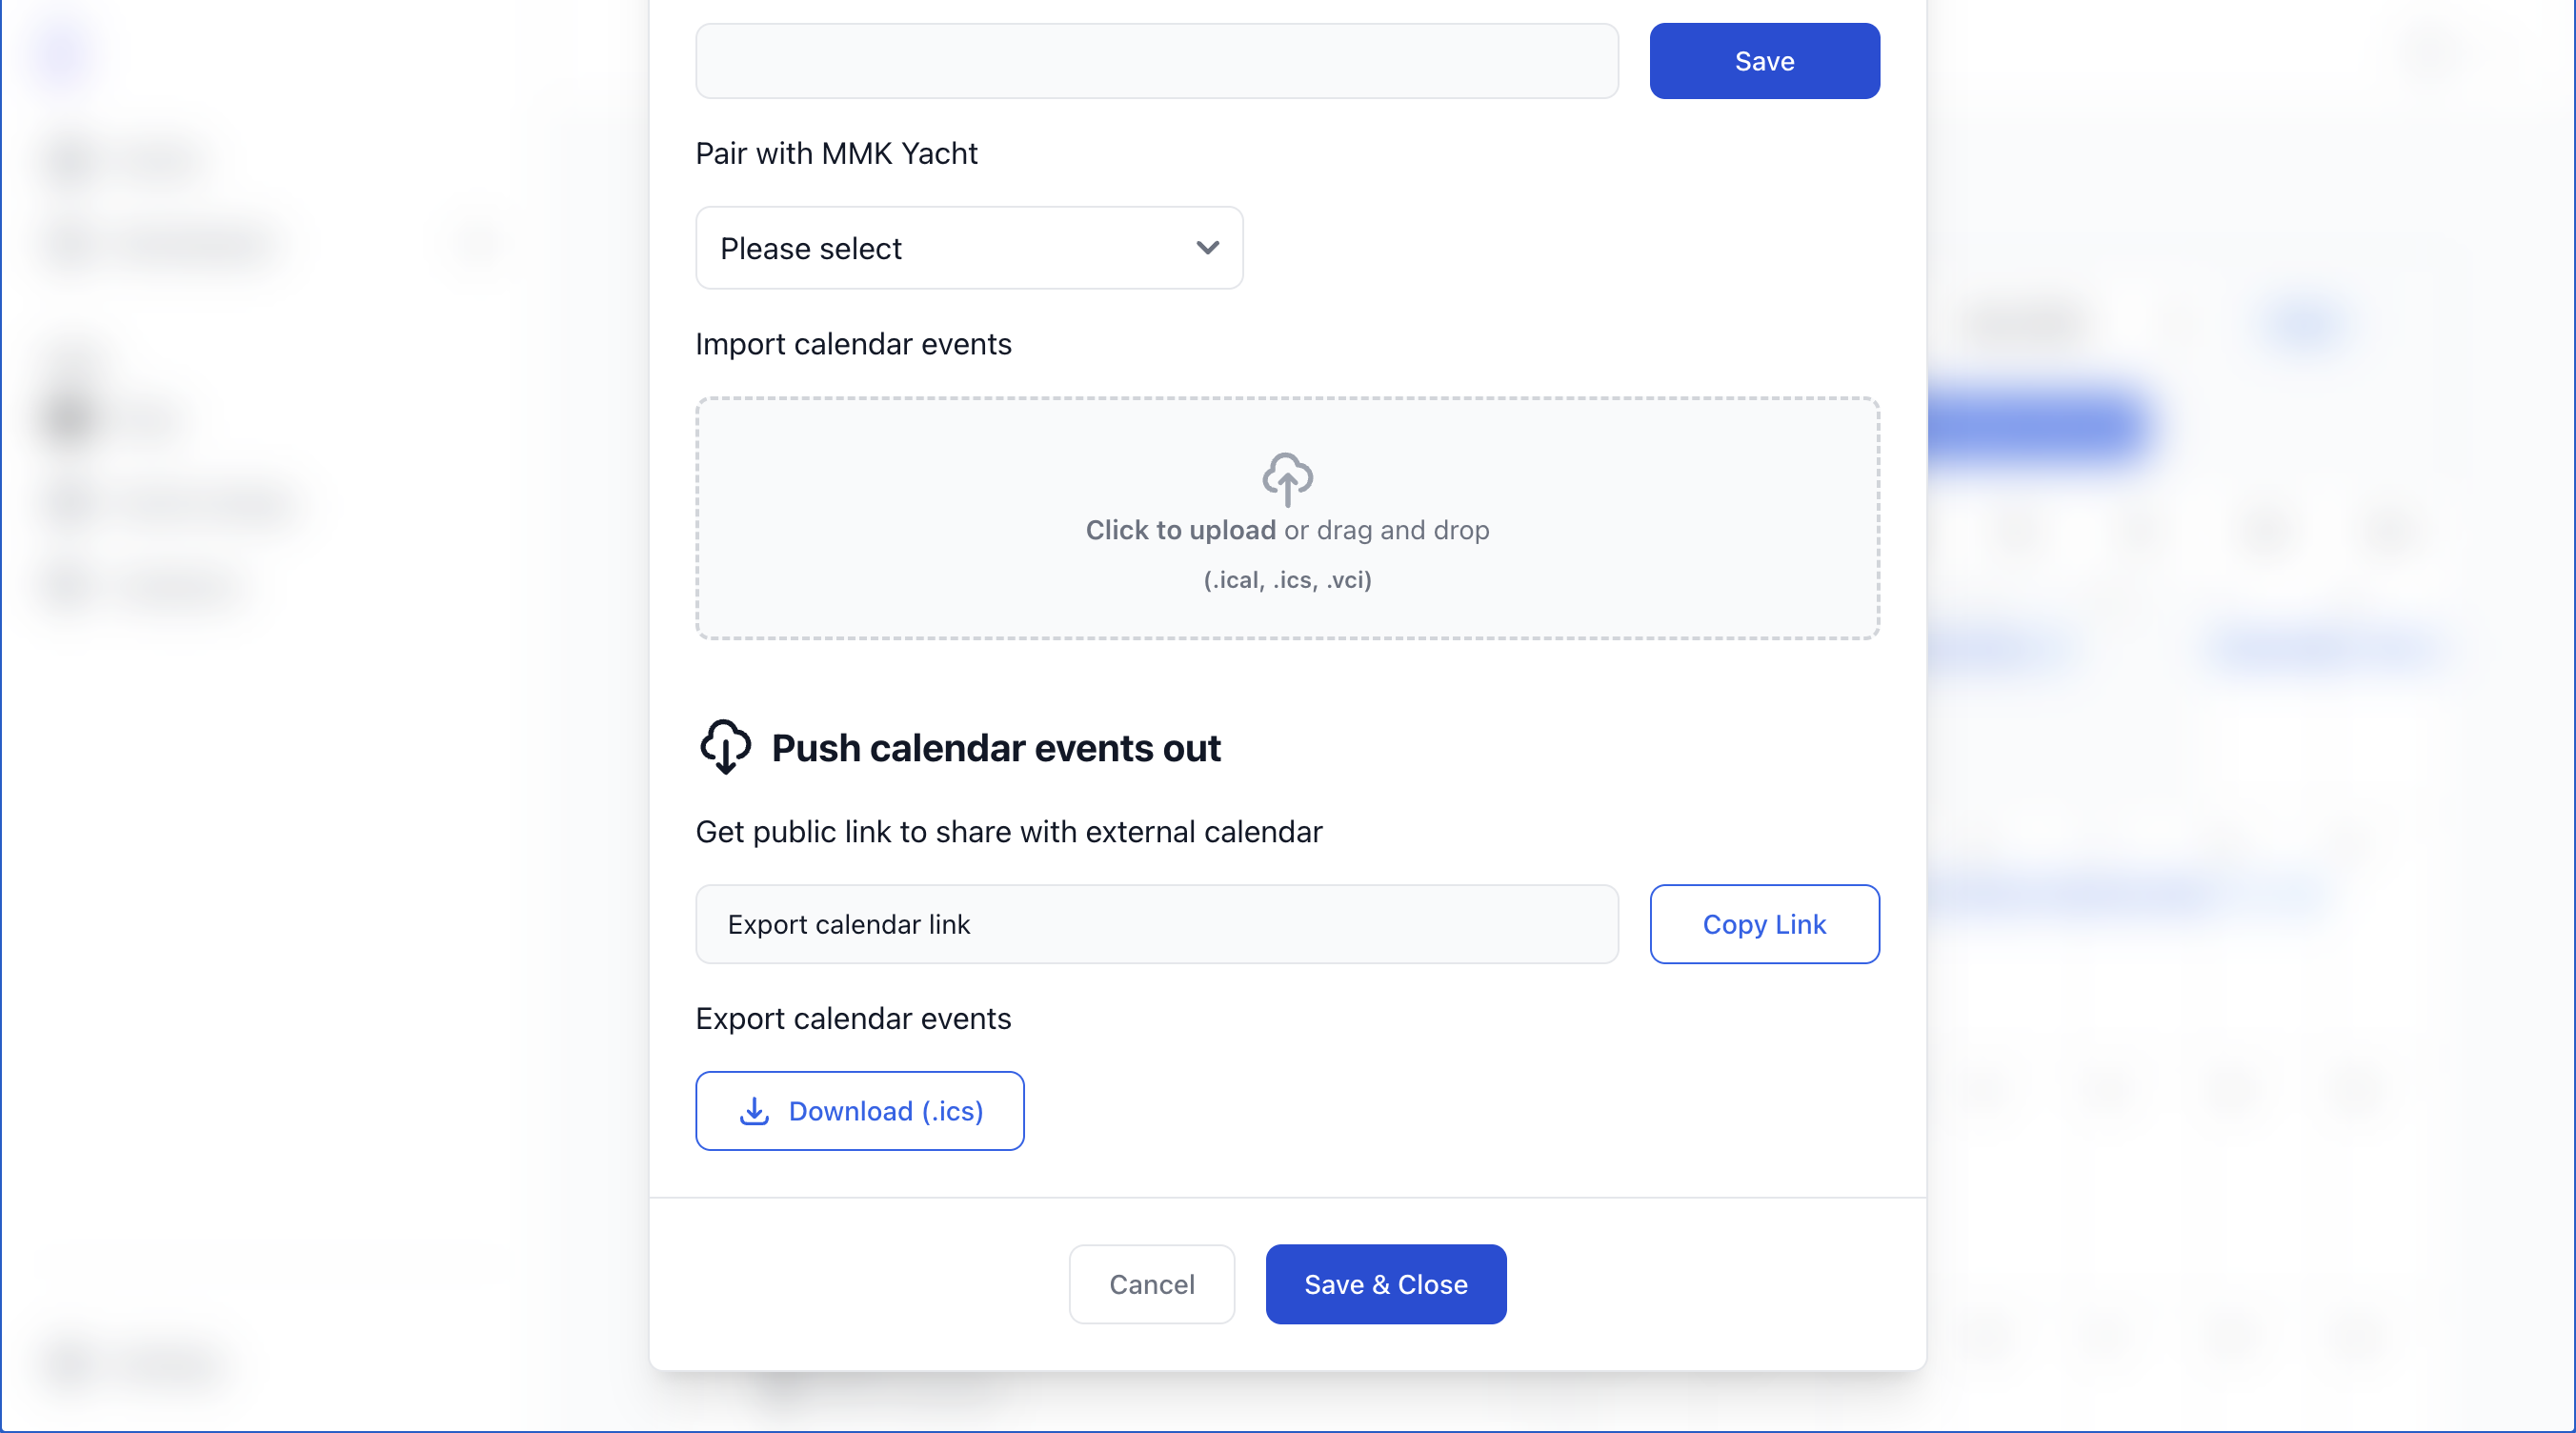
5. Inside the field under 'Pull calendar events in' provide your public link to your external calendar and then click save.
If you arn't sure what your public link is or how to generate it, see the chapter listed below titled 'How to find or generate your Calendar's Public link'.
6. In the drop down 'Pair with MMK Yacht', find and select the appropriate Yacht from the list that you want to pair the calendar with.
6. Once added click the Save & Close button at the bottom of the popup.
How to find or generate your Calendar's Public link
Google Calendar: Creating a Public URL link
Make your calendar public:
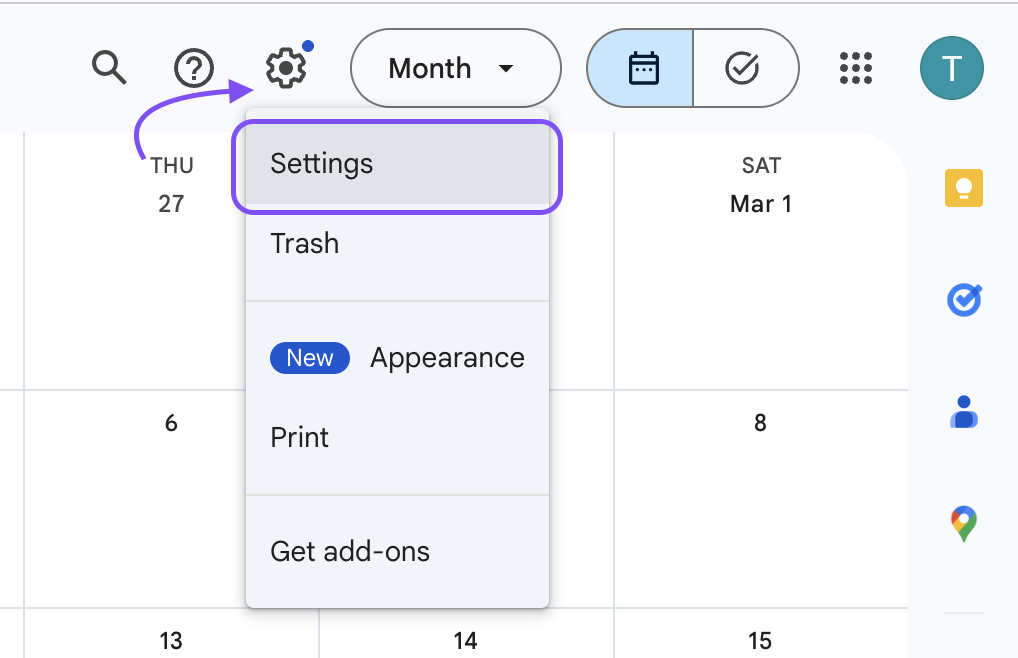
- Open Google Calendar and navigate to the calendar's settings.
2. Scroll down to the Calendar's name you want to share (that will be either under your name/Company's name). On the left-side of the page see "Sharing" and enable the "Make available to public" option.
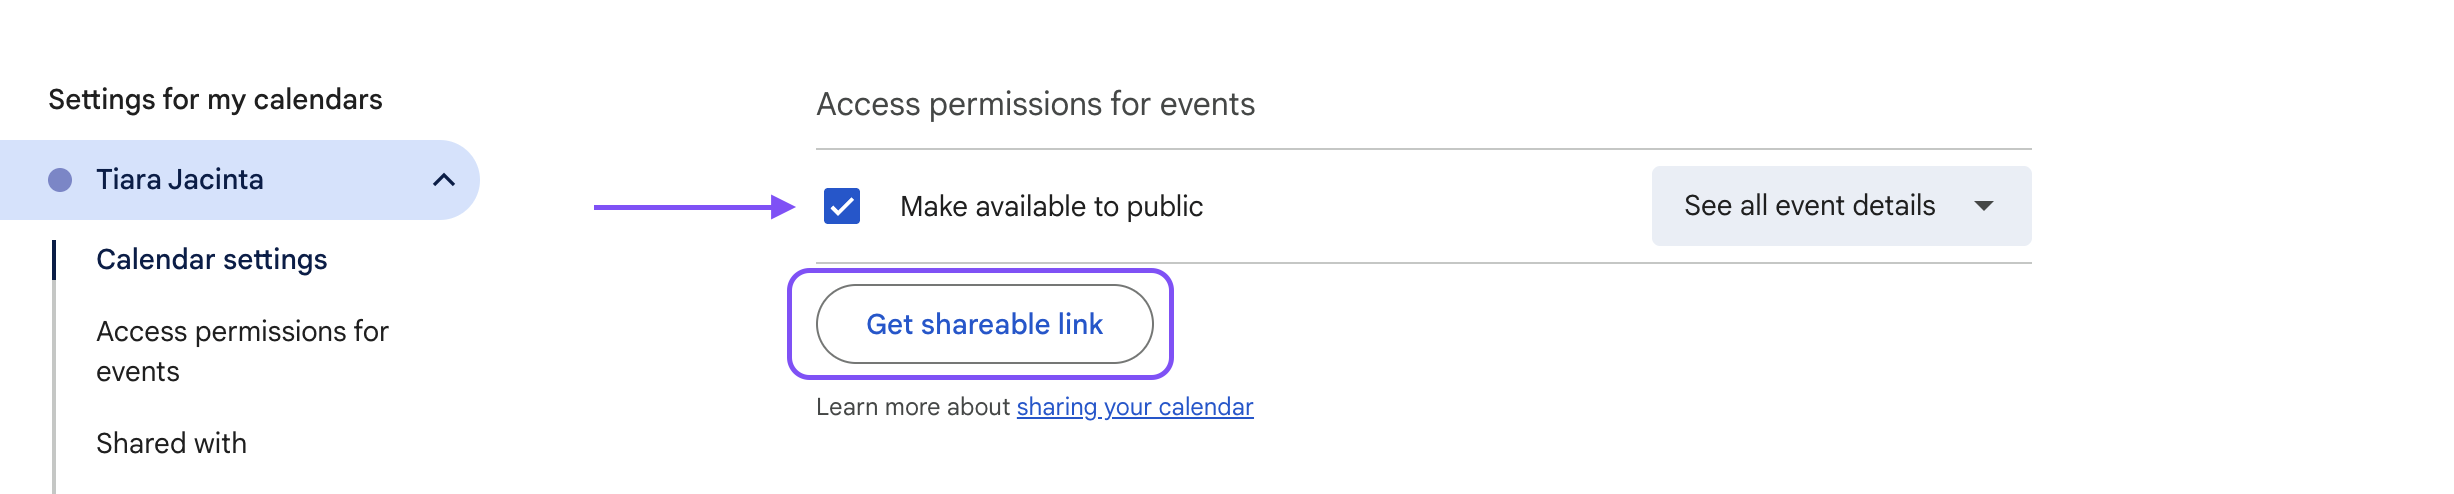
3. Click 'Get sharable link' and copy the link in the pop up.
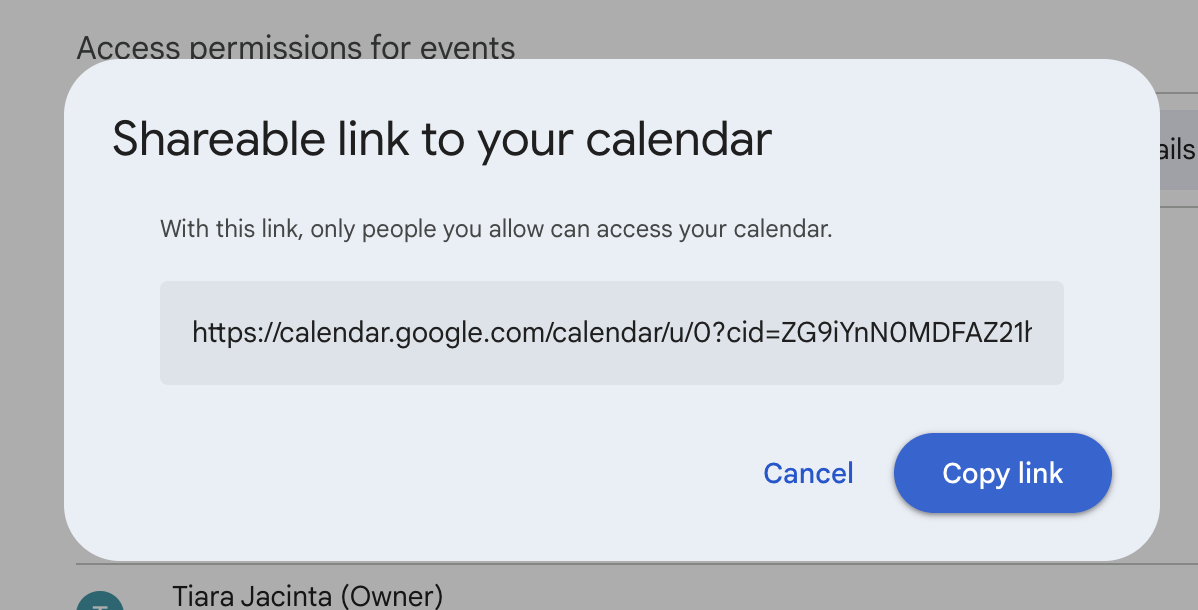
4. Paste the link into the public link field from Step 5 above.
Outlook Calendar: Creating a Public URL link
- In Outlook on the web, go to Settings > Calendar > Shared calendars.

2. Under 'Publish a calendar', select the calendar you want to publish from the dropdown and then select 'Can view all details'.

3. After you've selected your calendar and permissions, click 'Publish'.
4. You'll see two links: an HTML link and an ICS link.

5. Copy the ICS link and paste it into the public link field from Step 5 above.
Note: ICS Link: This allows recipients to subscribe to your calendar, and events will be automatically updated in their calendar.
Still Need Help?
Speak to our Customer Success team, who are here to support you via support@ankor.io or chat with us using the Life ring Help feature at the bottom right of our application.